Shenzhen Ready: Difference between revisions
| (20 intermediate revisions by the same user not shown) | |||
| Line 1: | Line 1: | ||
[[File:overview_ucok-shenzhen.jpg| | [[File:overview_ucok-shenzhen.jpg|thumb|240px]] | ||
==Classics == | ==Classics == | ||
<gallery mode=packed-hover heights=200px> | |||
File:Screenshot_2016-07-07-23-34-10.png | |||
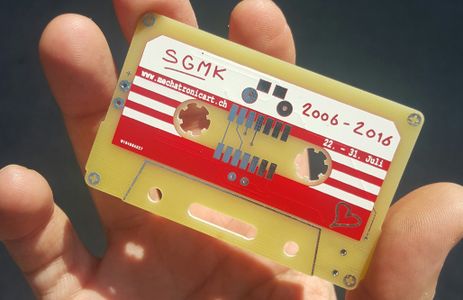
File:SGMK_10Years_micronoise_naked.jpg | |||
File:HitTheTuneesy_DONE.png | |||
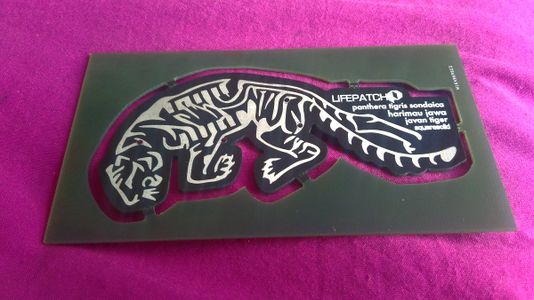
File:TigerSynth_on_pink.jpg | |||
File:openTheremin_tre.jpg | |||
</gallery> | |||
=== Online Showcases of PCBs === | |||
[http://cardboardelectronics.tumblr.com/ Cardboardelectrnics Collection of PCB projects curated by D. Kera] and her "academic" [https://www.academia.edu/12644489/Uncanny_Microelectronics_Intaglio_and_the_Aesthetics_of_Circuit_Boards article]. | |||
=== Other sources and methods === | |||
https://wiki.hope.net/index.php?title=Artistic_PCB_Design_for_Terrified_Beginners_workshop | |||
http://41j.com/blog/2016/09/weird-pcb-layouts-with-kicad/ | |||
https://github.com/mtl/svg2mod | |||
= How to prepare the files = | = How to prepare the files = | ||
| Line 33: | Line 51: | ||
== Important files and formats to export == | == Important files and formats to export == | ||
* Export as bitmap the following layers: Copper, StopMask, SilkScreen | |||
* 600 or 1200 dpi has been shown to give good enough quality | |||
* Export the cut-out layer individually (copy into new file) as .dxf | |||
* (the drill layer is best made in KiCAD) | |||
Special features for the mixtape | |||
* in GIMP you can use the color selection tool, Threshold 100 was good for yellow. | |||
* make sure you add white backgroun | |||
== Finalizing in KiCAD == | == Finalizing in KiCAD == | ||
| Line 40: | Line 68: | ||
* install and start KiCAD | * install and start KiCAD | ||
* Make a new project and define file path | * Make a new project and define file path | ||
* Make a custom personal library for your crazy footprints and logos | * Make a custom [[personal footprint library]] in KiCAD for your crazy footprints and logos | ||
=== Import using Logo-Importer === | |||
* Be careful white means it's there | |||
* double check negative/positive (no transparency!!) | |||
* click export | |||
* navigate into your personal library and name it understandibly | |||
* find generated using your file browser .kicad_mod in your personal library | |||
* Find/Replace with text editor to change to your wanted layer (F.Cu, F.Mask...) | |||
=== Export all gerber files === | |||
check them here: http://viewer.tracespace.io/ | |||
== Panelizing for automated assembly == | == Panelizing for automated assembly == | ||
== Send for manufacturing == | == Send for manufacturing == | ||
* Make extra notes to the manufacturer to use the file as is, or clarify all the weird shapes and layers. | |||
Urs' favorite: http://www.pcbway.com/ | |||
* limited colors for silk screen. | |||
* around 1$ for our typical size of pcb. | |||
* delivery usually around 10-15 days, delivery and customs can add 20-40 $ | |||
Latest revision as of 17:25, 28 November 2020

Classics
Online Showcases of PCBs
Cardboardelectrnics Collection of PCB projects curated by D. Kera and her "academic" article.
Other sources and methods
https://wiki.hope.net/index.php?title=Artistic_PCB_Design_for_Terrified_Beginners_workshop
http://41j.com/blog/2016/09/weird-pcb-layouts-with-kicad/
https://github.com/mtl/svg2mod
How to prepare the files
Basics
Go crazy and draw, paint, design your boards as you wish!
some inspriations here: http://dusjagr.hotglue.me/
See some of our classics: File:MadLab_circuit_classics.pdf
Inkscape preparations
... still needs to be updated!
Example from ucok's Biosynth: http://lifepatch.org/Biosynth
The cut-milled border should be 2mm, some pcb manufacturers then just use a 2mm tool. this will be the cheapest, but reduced resolution in the sharp corners.
Important files and formats to export
- Export as bitmap the following layers: Copper, StopMask, SilkScreen
- 600 or 1200 dpi has been shown to give good enough quality
- Export the cut-out layer individually (copy into new file) as .dxf
- (the drill layer is best made in KiCAD)
Special features for the mixtape
- in GIMP you can use the color selection tool, Threshold 100 was good for yellow.
- make sure you add white backgroun
Finalizing in KiCAD
First time KiCAD users
- install and start KiCAD
- Make a new project and define file path
- Make a custom personal footprint library in KiCAD for your crazy footprints and logos
Import using Logo-Importer
- Be careful white means it's there
- double check negative/positive (no transparency!!)
- click export
- navigate into your personal library and name it understandibly
- find generated using your file browser .kicad_mod in your personal library
- Find/Replace with text editor to change to your wanted layer (F.Cu, F.Mask...)
Export all gerber files
check them here: http://viewer.tracespace.io/
Panelizing for automated assembly
Send for manufacturing
- Make extra notes to the manufacturer to use the file as is, or clarify all the weird shapes and layers.
Urs' favorite: http://www.pcbway.com/
- limited colors for silk screen.
- around 1$ for our typical size of pcb.
- delivery usually around 10-15 days, delivery and customs can add 20-40 $


